My Workflow
· revised
I’ve now largely settled on what I believe to be an acceptable workflow for scanning my film negatives. This was a laborious process of trial and error, so I wanted to document it for anyone trying to do it themselves.
Tools
Epson Perfection V600 Photo Scanner
Consumer flatbed scanners get a bad rap mostly because they’re finicky and can be difficult to work with; learning to use a flatbed was probably the most tedious part of coming up with this workflow. The issue with these machines is that they are consumer grade and come with consumer tolerances; each individual scanner is unique. That said, these are very capable machines if you’re patient enough to figure them out.
Questions you have to ask about your scanner
Where is its plane of focus?
Flatbeds are designed so that their focus height is just above the glass bed. This is because the negative carrier sits on top of the bed, and the negatives themselves are elevated as a result; my scanner’s focus height is on the glass or close to it. I found this out by scanning a staircase of coins and comparing the sharpness of each step.
Does the manufacturer’s negative holder work?
Obviously the holder won’t be suitable if it lifts the negative beyond the scanner’s plane of focus, but another inherent issue is the flatness of the negative while in the holder. This partially depends on what film you use. Some stocks curl more than others, but consensus is that Epson holders aren’t great across the board; custom holders are available, but it’s difficult to tell beforehand if a given holder will work. I imported this innovative design, which applies pressure along the edges to help with flatness, before discovering that my scanner’s focus height was well below the height that any holder would lift my negatives to.
Reflection Control or anti-Newton ring glass
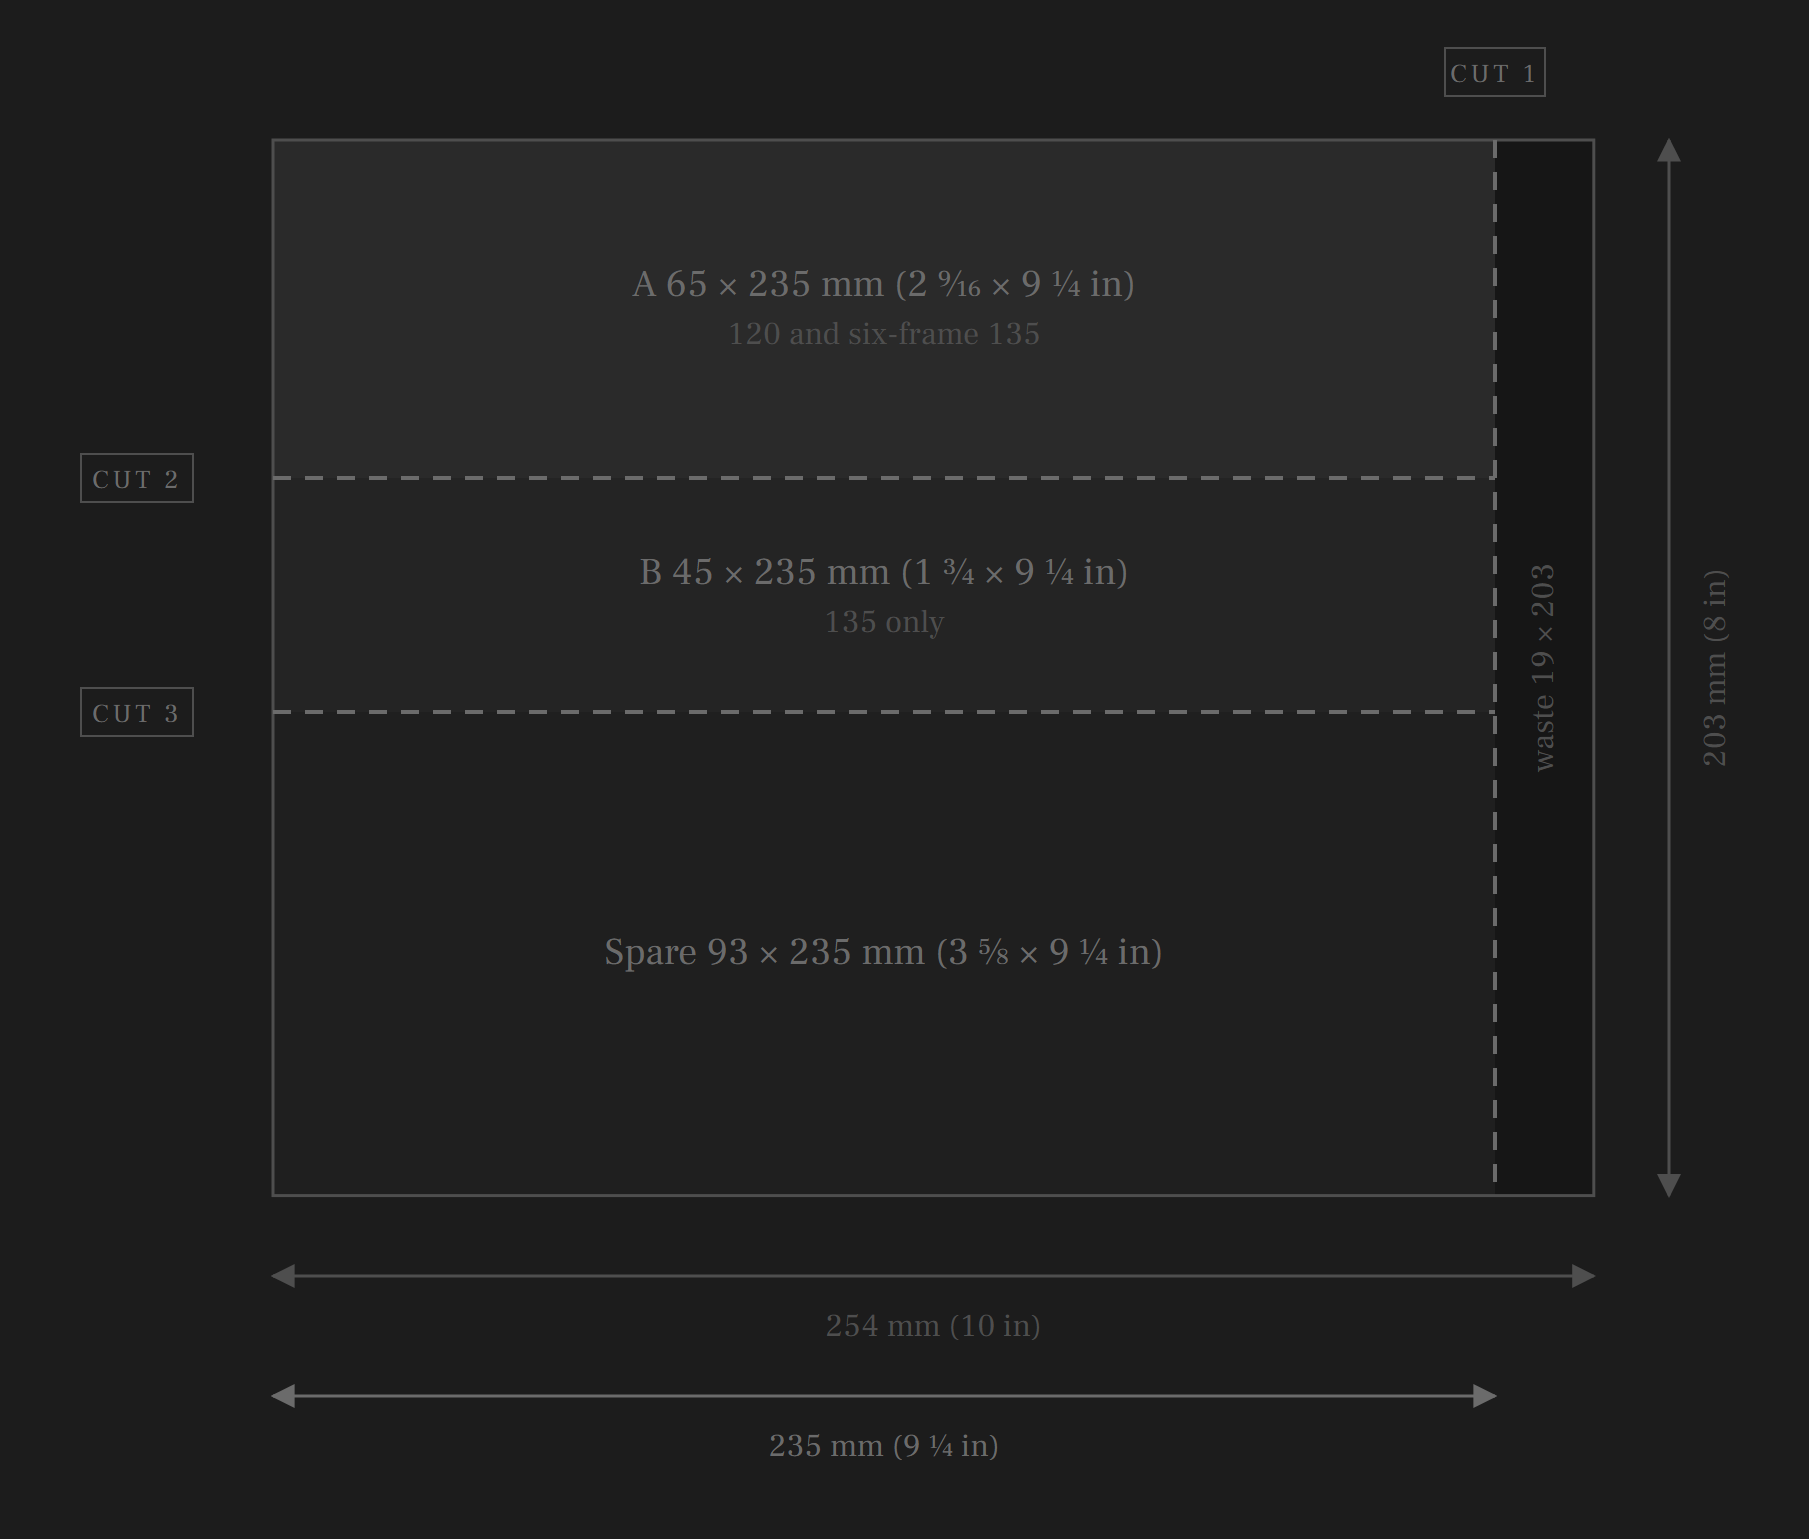
The focus height of my scanner being near the glass bed itself turned out to be a blessing in disguise. I scan with my negatives directly on the bed, emulsion side down, facing the sensor. In order to maintain flatness I use a piece of Tru Vue Reflection Control glass. For this purpose one side of the glass must be etched to prevent Newton rings, an interference pattern of concentric light and dark rings resulting from the reflection of light between two reflective surfaces. From an 8″x10″ sheet I recommend these cuts (fig. 1) for use with 135 and 120 film; I usually use the larger 120 piece for 35mm scans due to its increased weight, which aids flatness.
Software
SilverFast Ai Studio
A cheaper version or alternative may work. The main requirement for this workflow is the ability to produce 48-bit color (even for black & white film) unprocessed, linear scans of individual negatives.
ScanTool
This tool of mine isn’t public. Perhaps it should be. This tool is used to quickly straighten frames, remove scanning artifacts, invert negatives into positives, and produce standardized crops across images belonging to a series, like diary.
Capture One
Or your editing software of choice; I like lifetime licenses, personally.
Misaki
My tool for dust removal.
GIMP
Or alternative. This is used for sharpening and final exports.
From Negative to Digital Image
Key Principles
- Nondestructive editing: with the exception of the initial scan, every step and decision in this process can be backtracked or revisited.
- Bit integrity: every stage uses 16-bit uncompressed TIFF files to avoid accumulating errors and altering tones.
- Series consistency: photographs that are part of a series need to be treated similarly, especially with regard to cropping.
Scanning
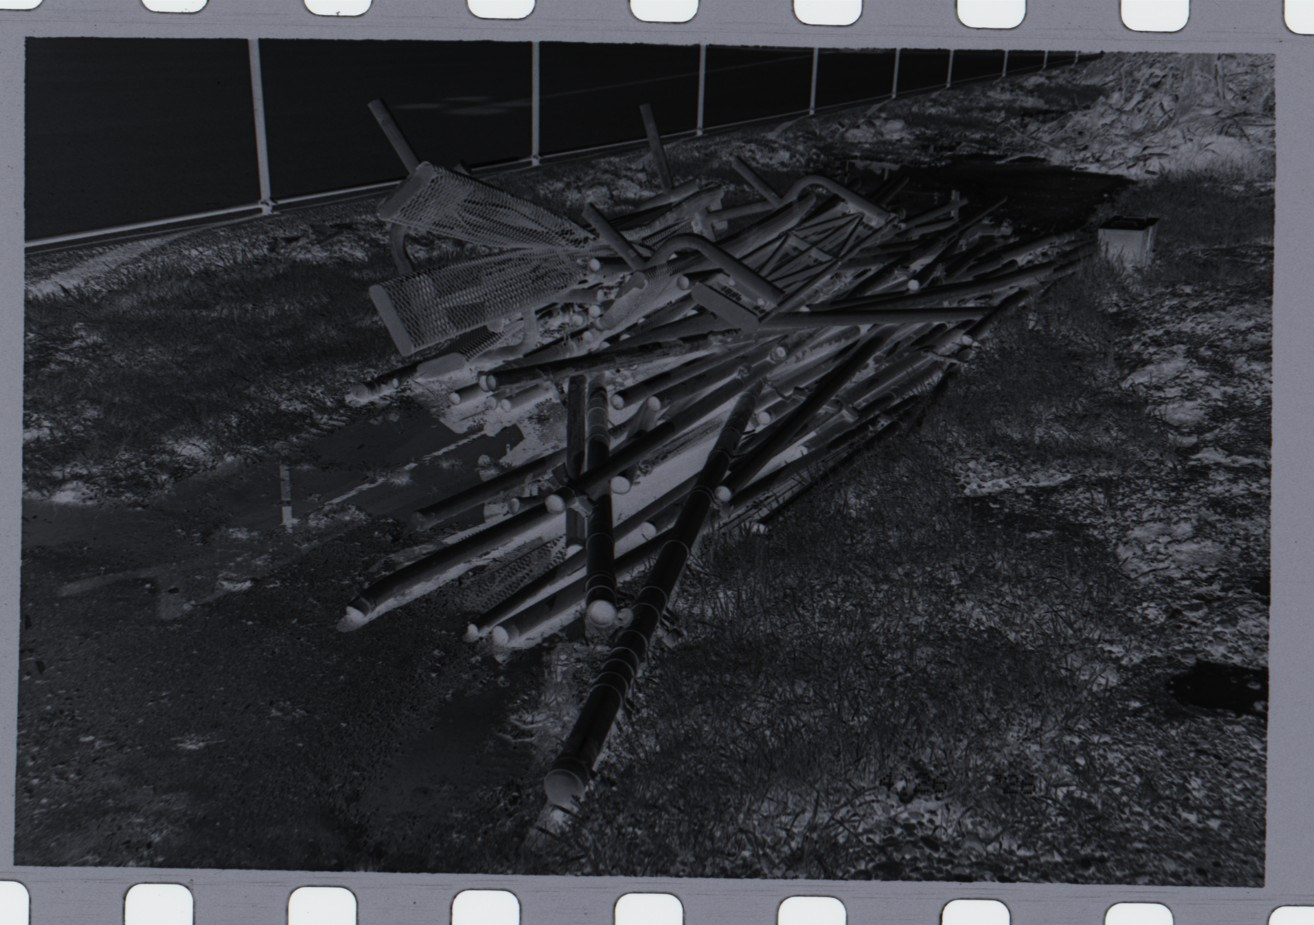
This is a rather slow and tedious process, especially if you have a lot of negatives to scan. You’ll want nitrile gloves to avoid leaving marks on the scanner bed and glass. Non-ammonia glass cleaner, microfiber cloths, a loupe and a light table for inspecting negatives, and PEC-12 fluid and PEC-PADs for cleaning them prior to scanning are also useful. Negatives are placed emulsion side down with reflection control glass sitting on top, etched side down. In SilverFast I prescan before drawing boxes around the negatives I want to scan. These boxes are very generous, generous enough to capture the sprocket holes and, where possible, the rebate markings. Scans are always done in negative mode, at 3200 ppi, and output as 48-bit HDR RAW TIFF files into a scan folder. Images at this stage (fig. 2) are flat, non-inverted, and tilted.
Preparing
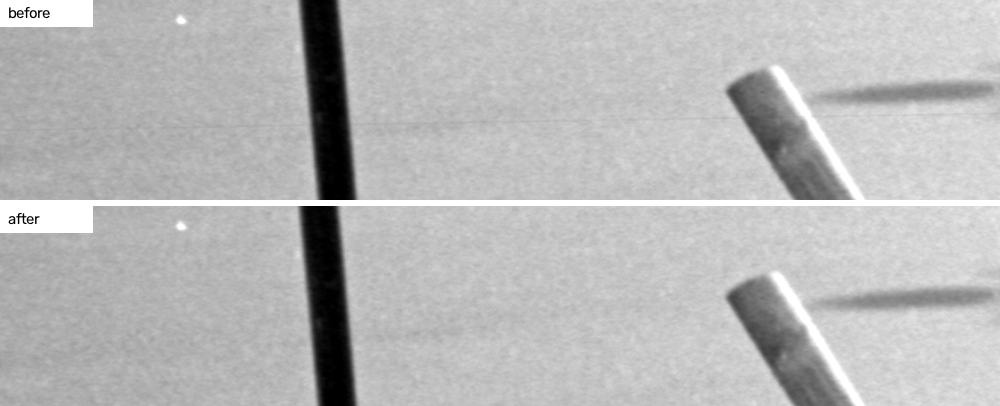
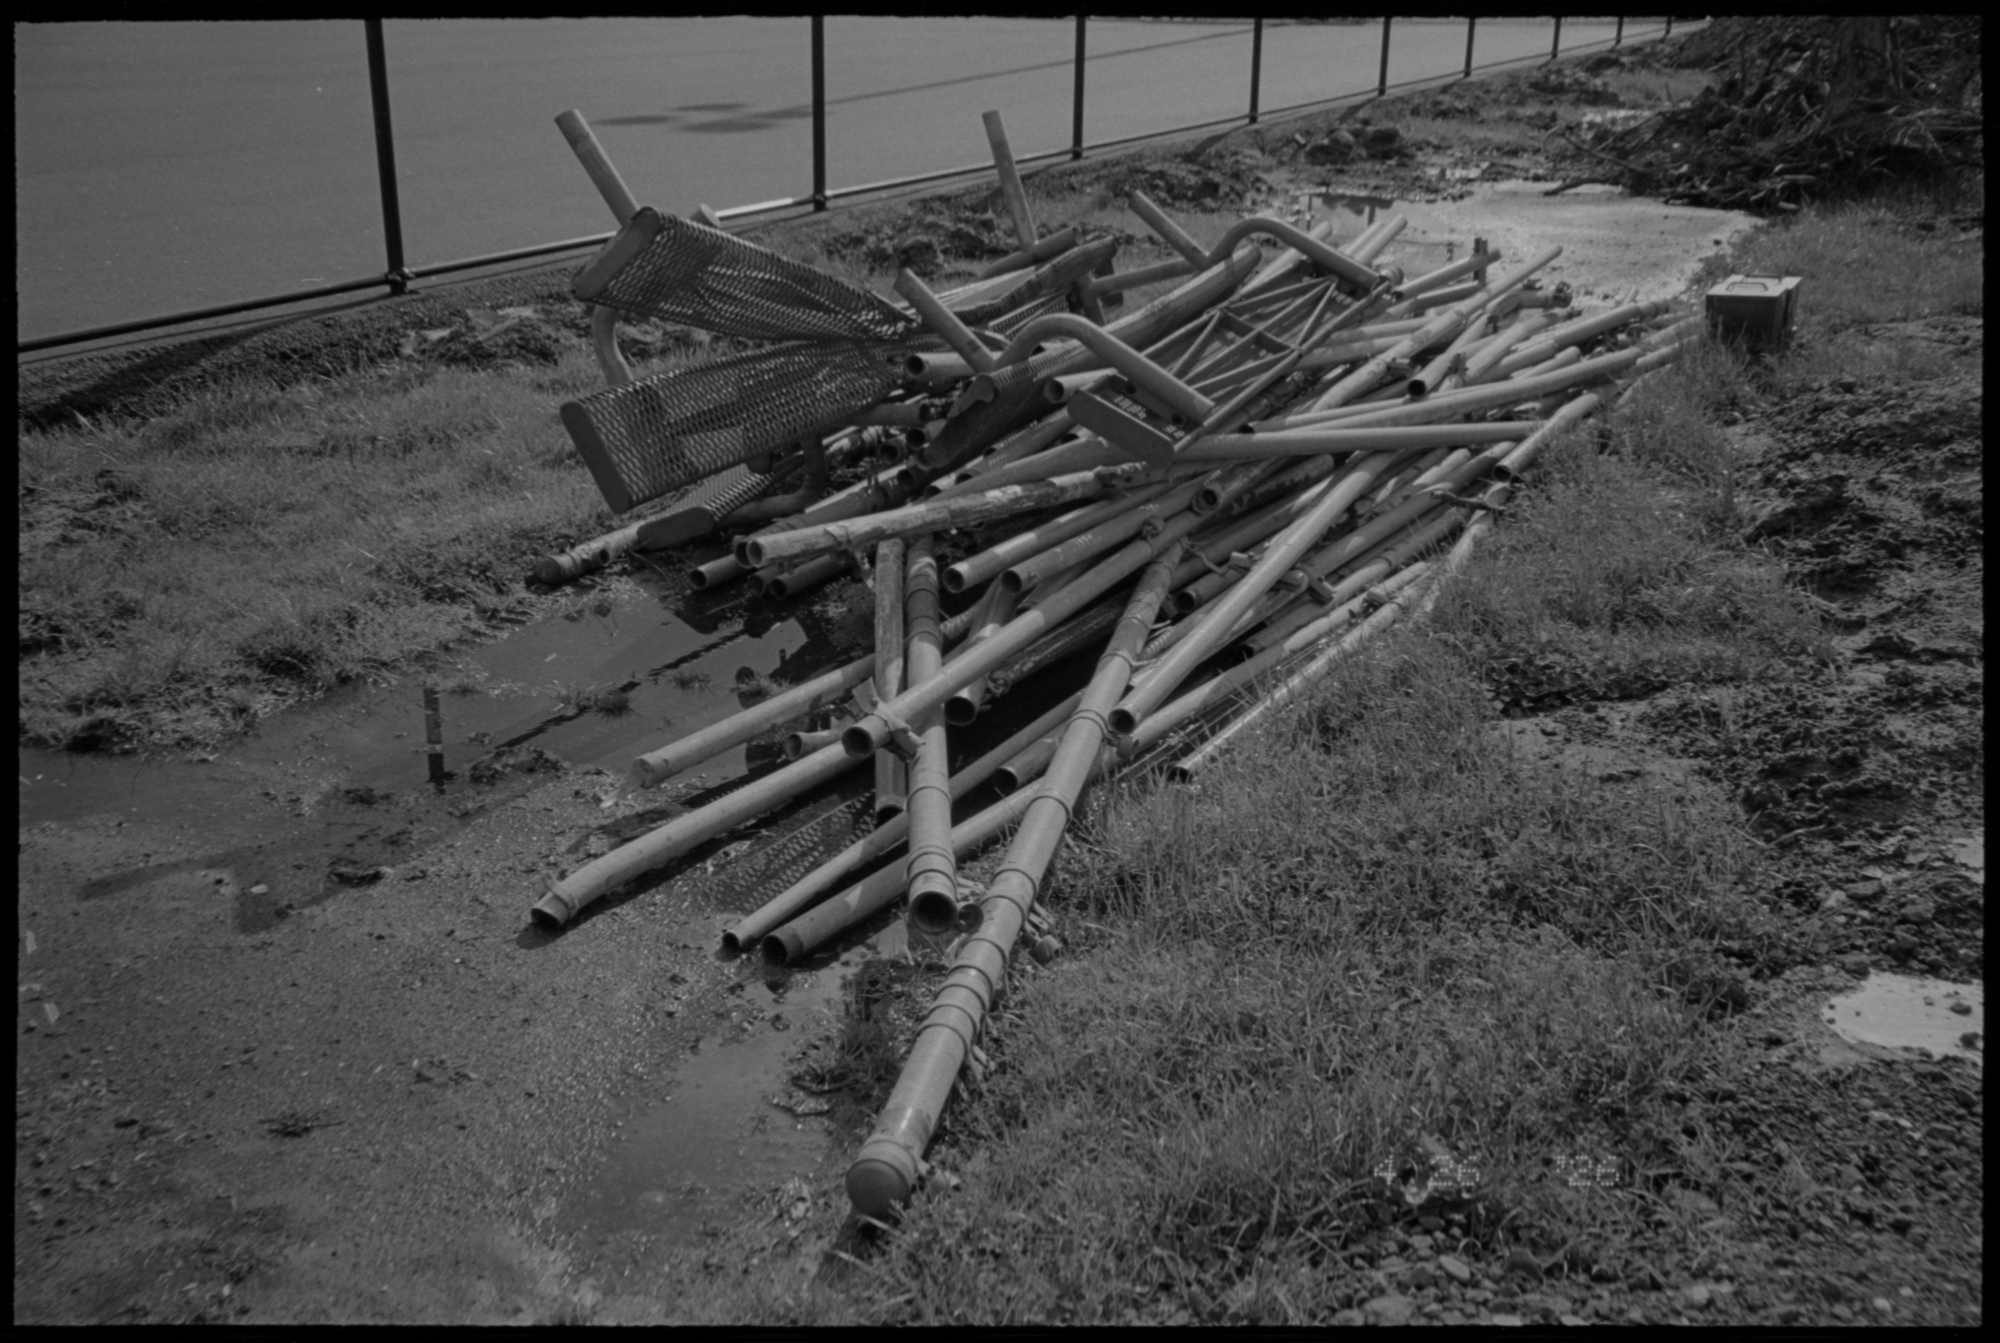
ScanTool performs several operations on the images. These 48-bit files have three 16-bit channels, red, green, and blue. Green is generally the sharpest, although I haven’t tested it; what’s important is that ScanTool uses the channels to remove a persistent artifact caused by a fault in my scanner’s sensor that affects about a third of my scans, a line that spans the width of the image (fig. 3). ScanTool, which could use a better name, corrects this and removes the line by subtracting the offset along that line. Next, the scan is reduced to one channel, usually green (Note: I only shoot black and white negative film, so I only need one channel) and the image is mirrored, if necessary; SilverFast will produce correctly oriented scans of emulsion side down negatives if the user flips the preview prior to scanning. ScanTool straightens the images, crops to the frame, plus a 40-pixel border, and inverts the negative into a positive, ensuring that no values clip. This results in a new file, a 16-bit positive (fig. 4), alongside a sidecar file that records important image geometry; both are written to the top of the project folder.
Edit
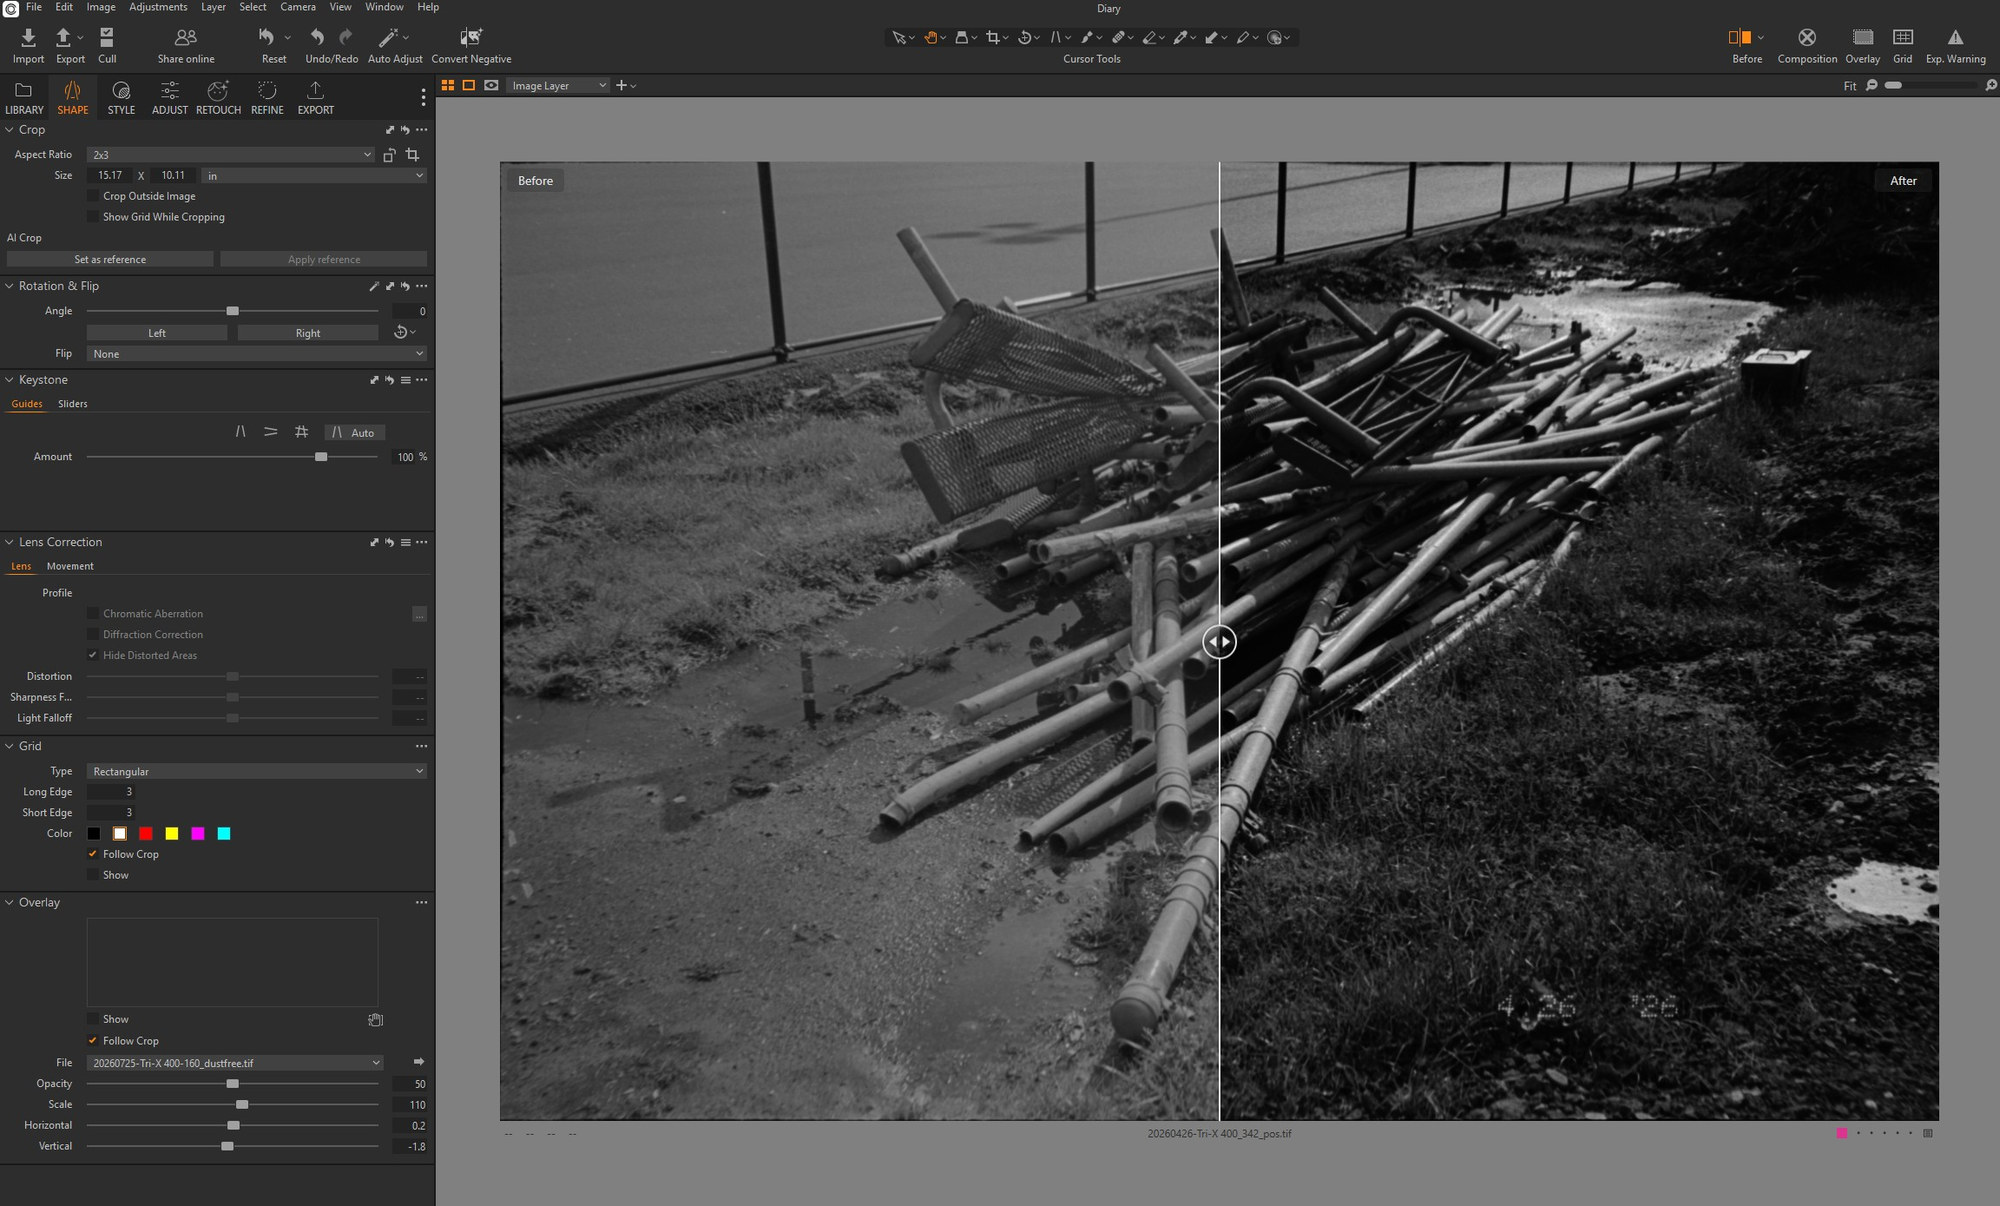
In Capture One, I import these positives and edit the images until I reach my desired look (fig. 5). The most important editing procedure here when working in a series is the initial crop. The tighter the crop, the larger the grain appears at a given display size. Because it’s desirable to maintain a consistent look across a series of images, it’s important to consider which image will have the most substantial crop, because, later, other images will have to be cropped further to match it. Edited files are exported to an exports folder as 16-bit uncompressed TIFFs at 100% scale, sRGB, with output sharpening turned off.
Misaki
In Misaki, I slowly survey the images removing dust and hairs as needed. Cleaned images are exported to the exports folder and have “_dustfree” suffixed to their file names.
Trim
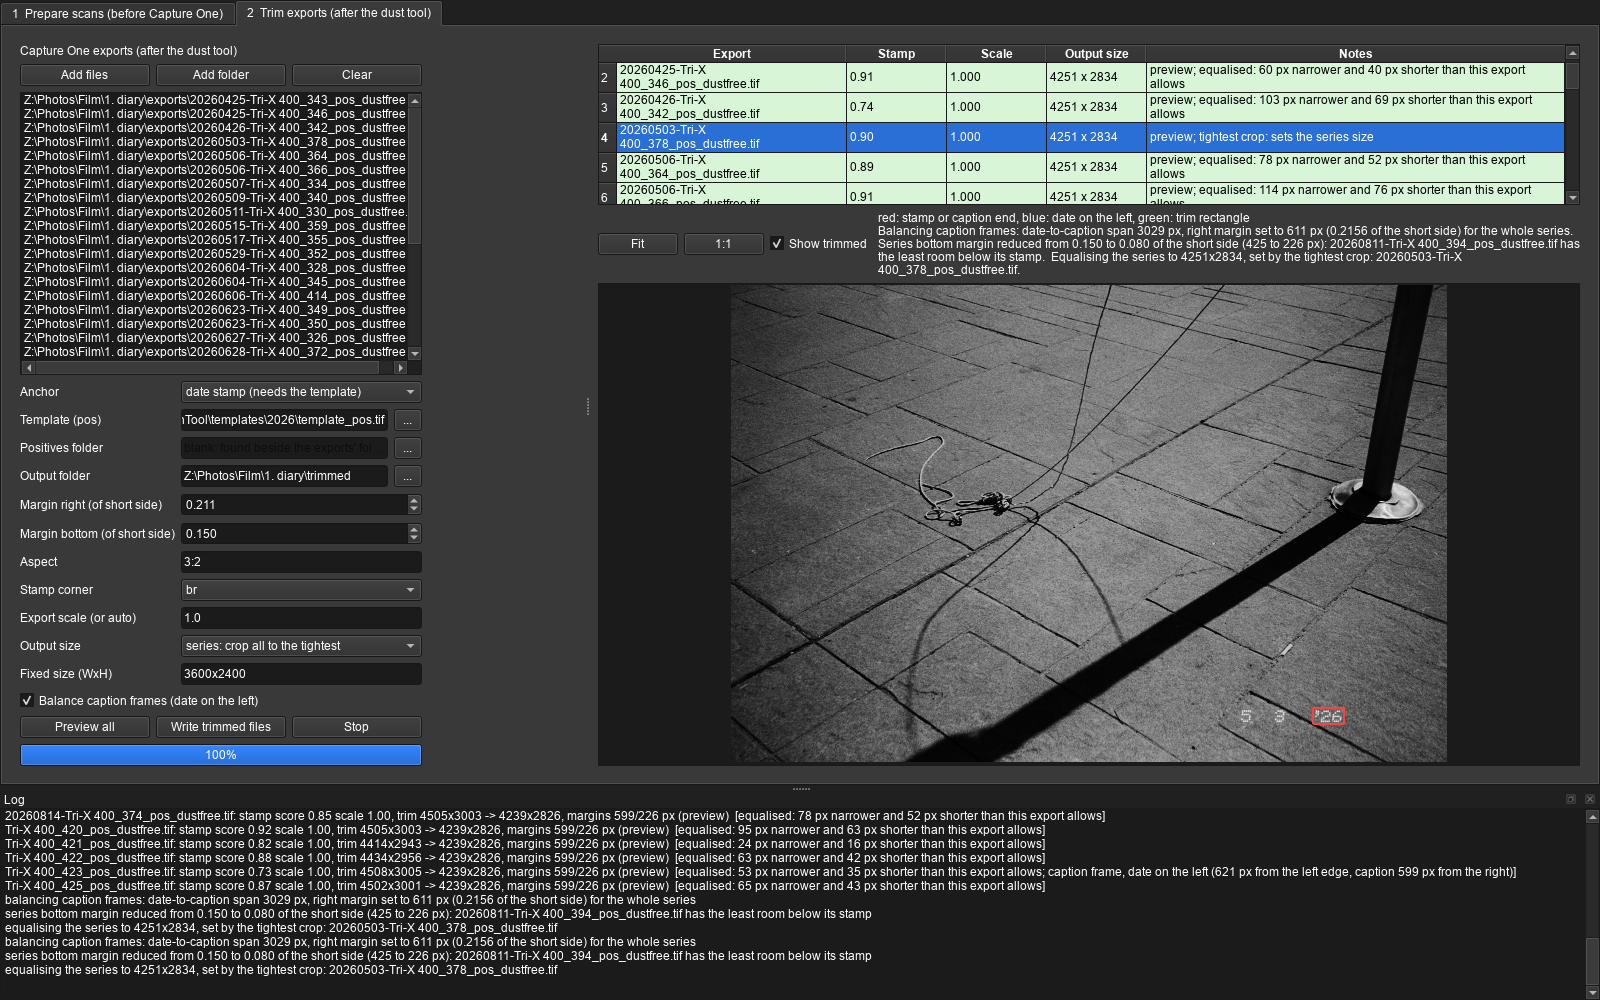
Going back to ScanTool, the images are added to the “Trim” tab (fig. 6). Without resizing, the images are cut to the size of the tightest crop established in Capture One. Trimmed images are exported as 16-bit TIFFs to a trimmed folder, alongside a sidecar file that records geometry and file lineage.
GIMP
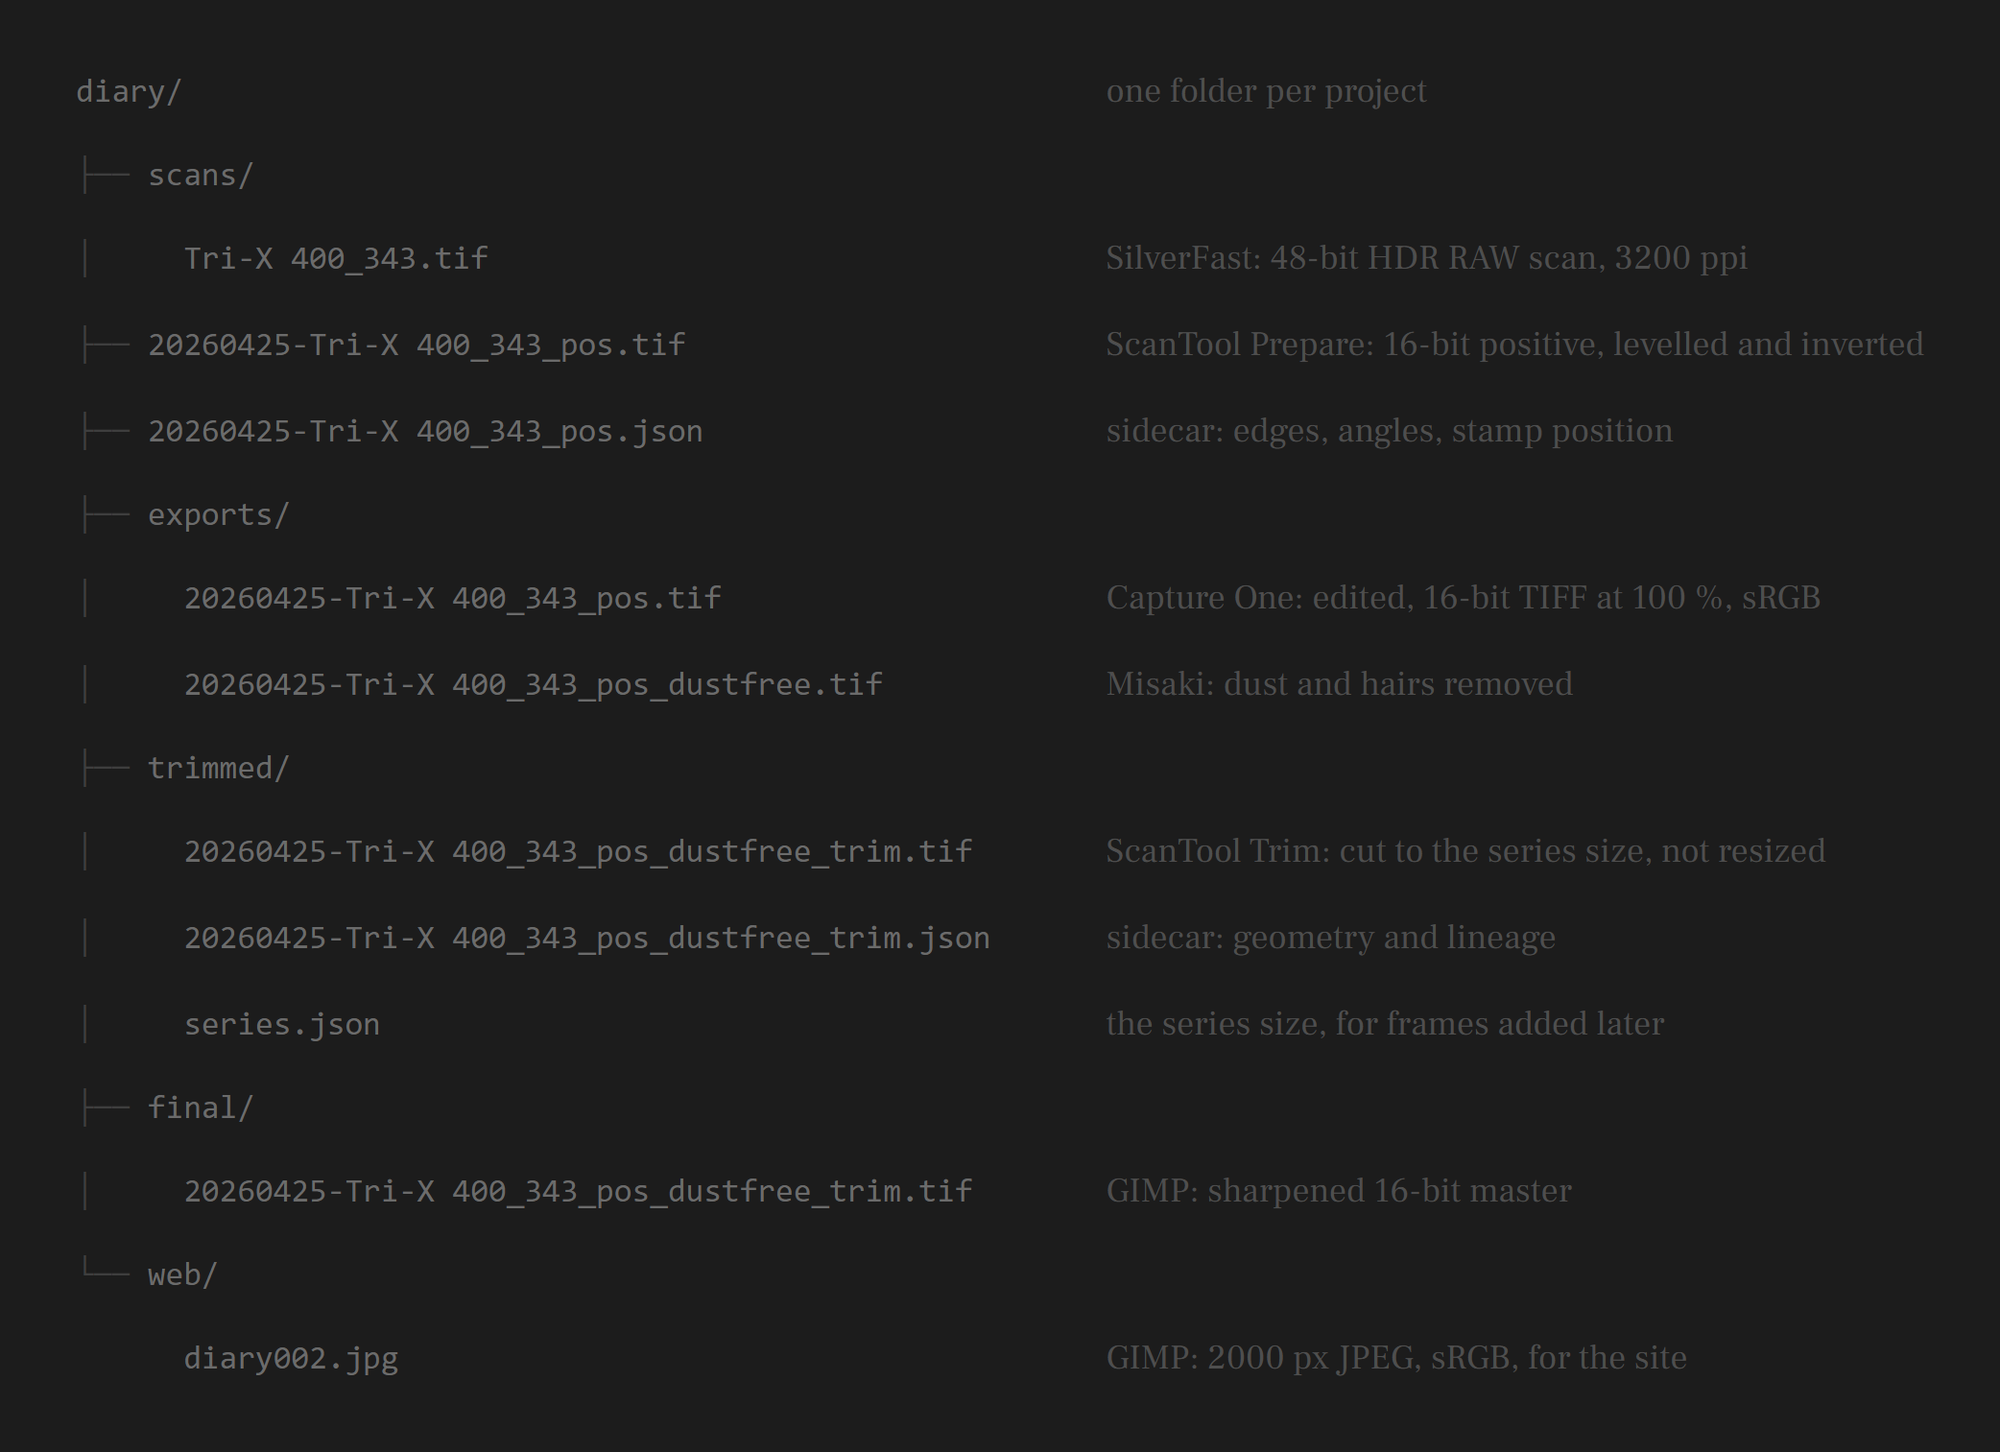
Trimmed images are opened in GIMP for sharpening. Each image has its layer duplicated and is sharpened to taste using high pass. My general starting point is Standard Deviation 2.0, Contrast 2.0 blended using Overlay or Grain merge. Sharpened images are exported to a final folder as 16-bit TIFFs; these are the finished master files. At this point I perform the first real instance of lossy editing by optimizing the images for web use. Photographs are scaled to 2000 pixels wide with LoHalo and exported to a web folder as JPEGs at a quality setting of 85, 4:4:4 color, and the sRGB color profile. You can see the final file structure below (fig. 7).
I hope you might find this useful. In writing this I’ve found that there are some obvious areas where things could be improved, but the principles and information here should aid anyone attempting to scan their own film and prevent quite a few headaches along the way.